When using an intraoral scanner, be careful in these five areas. You’ll be able to prevent inaccurate impressions and other scanning issues by following these tips.
The number one rule of taking a digital impression is, “If you can’t see it, you can’t scan it.” The intraoral scanner is just a camera that stitches together tons of pictures to form the scan. A mistake too many dentists make is not packing cord and exposing the finish line to the camera. Scanner For Teeth
When taking a traditional PVS impression, the material will sometimes push the soft tissue down further, thus getting the full extent of the margin. This is not so with a camera. If soft tissue is covering the tooth, the scanner can’t see it. It doesn’t have an x-ray capability to see through the tissue. If blood engulfs the preps, the scanner can’t penetrate through the blood to see the margin. The scanner can’t see the margin if the prep is drowning in saliva. Keep the entire area dry and clear to scan. Anything that obstructs the scanner’s view of the teeth will prevent an accurate scan.
Cleanliness and maintaining a routine are just as important. Dirty tips will affect the accuracy of the scanned image. Inspect the tip before using it. If it’s smudged and has droplets on the mirror, this will affect the scan. Wipe it off, and make sure to calibrate the unit. A poorly maintained piece of equipment will perform poorly.
Going extra slow and spending a lot of time scanning is not necessary. Holding the scanner on a tooth for a long time trying to get every detail results in an extraordinarily large file size. Your software will inform you of the fact that you are using too many resources. This usually causes the scanner to slow down. The key is to scan rather briskly and return to where you started.
More about intraoral scanners ... A review of 4 intraoral scanners: Which is the right one for your practice?
For example, for a full model, start at the occlusal of one molar and scan to the other molar, drop to the lingual of the current tooth and return to the other side, then drop to the buccal and go back. When you stop, the software will let you know of any areas you missed. The shaded areas will show where missing data is. Now, you can capture whatever was missed. A missing margin can be scanned and stitched to the existing scan.
This is something that cannot be done with traditional PVS impression material. Using the scanner software, you can erase the preps and then proceed to get the most detailed scan of the preps and any missing areas from the adjacent teeth. Some dentists use this method while others aim to get all the details in one shot.
When taking a bite registration, the patient is instructed to bite down and hold the mouth closed while the scanner is inserted between the cheek and the posterior teeth. Two issues can happen here.
First, the patient doesn’t always know what their bite is. They clench in the wrong position thus giving an incorrect bite. It’s best to guide the patient into the correct centric relation and then scan.
The other issue occurs when the patient slightly opens their mouth while the scanner is moving in the mouth. To keep from taking an improper bite registration, have your assistant either hold the patient’s mouth in position or ask the patient to bite on bite paper, and the assistant can pull on it while scanning to make sure the patient does not open their mouth.
Relying too much on scanning technology to make up for poor technique won’t cut it. If you can’t take a traditional PVS impression, you can’t take a digital impression. The scanner is not a magic wand, and it can’t see through soft tissue. It can’t correct undercuts, path of insertion, or any discrepancies in the overall prep. The scanner is just another tool for the dentist to use to relay information to the lab for a crown.
With stone models poured from a PVS impression, the lab tech can always fudge the die due to a tear or pull in the impression, a bubble or void, or just a very sloppy impression. The lab tech will do their best to connect the dots on the stone die and create a margin based on where they think it was going.
A digital impression goes directly to the lab software, so the ability to fudge is off the table. A stone model can be chipped and sculpted by the technician. If a digital scan is incomplete, it can’t be used. When printed, the material used to print is not the same as a stone die, and fudging that die is much more difficult.
When you’re finished scanning, look at the scan of the preps. Are the margins visible? Is the entire tooth scanned? Are the contacts clear and complete? The software will show hollow spots and holes in the teeth—this is a no-no. Make sure everything is clear and present.
Are you using the color mode or grayscale to examine the scan? Using the grayscale gives a more accurate model appearance of the scan and enables you to fully see your margins. It is at this point that you can always rescan a missing margin. You can even reprep the tooth and rescan just that tooth.
That’s the beauty of digital; you can repeat any step before sending your scan to the lab. Don’t make the mistake of scanning and then sending it off to the lab without checking the details first.
The scanner is just another dental tool like a drill or an explorer. It’s only as good as the operator. If you take good care of the intraoral scanner and use it correctly, it will serve you well. If you take shortcuts, don’t follow guidelines, and don’t take care of the unit, it will be just an adequate tool.
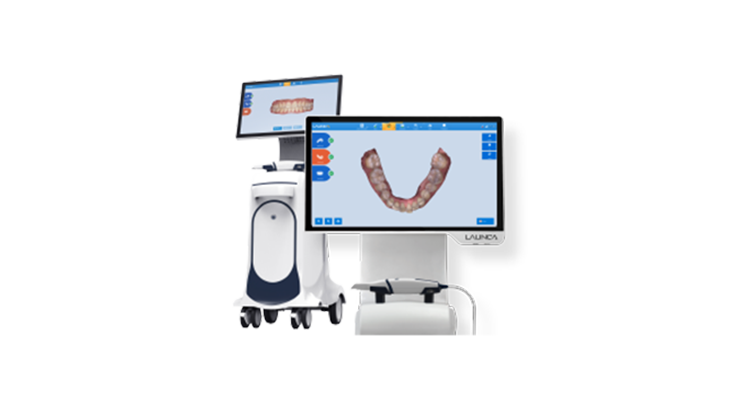
One of the better intraoral scanners that this author recommends is the NeoScan 1000 from Neoss (figure 1). This scanner is easy to use, affordable, and has good picture quality.
Dental Impression Scanner Price Editor’s note: This article originally appeared in Perio-Implant Advisory, a chairside resource for dentists and hygienists that focuses on periodontal- and implant-related issues. This article also appeared in the September 2023 print edition of Dental Economics magazine. Dentists in North America are eligible for a complimentary print subscription. Sign up here.